- Welcome Students!

This session will introduce you to the fundamentals of data science, with a focus on Python. We will cover the Python data science stack, essential tools and platforms, software setup, semester overview, and Python 101.
Session 1: Welcome Students!
This session sets the stage for your data science journey:
Python Data Science Stack: Dive into Python’s core data science libraries and frameworks. We’ve got you covered!
Ecosystem Deep Dive: Familiarize yourself with essential tools and platforms, such as Github, UCloud, Google Colab, and Jupyter. These will be integral to your studies and projects.
Software Setup: We’ll guide you through installing the crucial software. And don’t worry, our Teaching Assistants are here to assist with any challenges.
Semester Overview: Get a glimpse of what the upcoming weeks hold for you.
Python 101: We’ll ensure everyone is up to speed with Python basics.
Notebooks
Part 4: Cloning and Pushing to GitHub Using VS Code
This tutorial provides step-by-step instructions on how to install Visual Studio Code and Git, and how to use them to clone and push to a GitHub repository. The instructions cover both macOS and Windows.
Step 4.1: Install Visual Studio Code
For macOS:
- Visit the VS Code official website and download the stable build for macOS.
- Open the downloaded
.zipfile and extract VS Code. - Drag
Visual Studio Code.appto theApplicationsfolder, making it available in the Launchpad.
For Windows:
- Visit the VS Code official website and download the stable build for Windows.
- Run the downloaded
.exefile and follow the installation prompts. - Ensure you select “Add to PATH” during installation to enable launching from the command line.
Step 4.2: Install Git
For macOS:
4.2.1. Check if Homebrew is installed:
- Open Terminal and type the following command:
brew --version - If Homebrew is installed, you will see the version number. If not, proceed with the next step to install Homebrew.
4.2.2. Install Homebrew (if not installed):
- In Terminal, run the following command to install Homebrew:
/bin/bash -c "$(curl -fsSL https://raw.githubusercontent.com/Homebrew/install/HEAD/install.sh)" - Follow the on-screen instructions to complete the installation.
4.2.3. Install Git using Homebrew:
- After Homebrew is installed, run the following command in Terminal:
brew install git
4.2.4. Verify the installation:
- Check if Git is installed correctly by typing:
git --version - You should see the Git version number if the installation was successful.
For Windows:
- Download the latest Git for Windows installer from the Git website.
- Run the downloaded
.exefile and follow the setup instructions. - Make sure to choose the recommended settings, especially for adjusting your PATH environment.
Step 4.3: Configure Git
Open a terminal (macOS) or command prompt/Git Bash (Windows) and set your user name and email address with the following commands:
git config --global user.name "Your Name"
git config --global user.email "your.email@example.com"
Step 4.4: Clone a Repository Using VS Code
- Open VS Code.
- Access the Command Palette by going to the View menu and clicking on
Command Palette - Type
Git: Clonein the Command Palette and select it. - Enter the URL of the GitHub repository you want to clone and press
Enter. - Select the directory where you want to save the repository and click
Select Repository Location. - After the repository has been cloned, VS Code will ask if you want to open the cloned repository. Click
Open.
Step 4.5: Make Changes and Push to GitHub
- Open the folder of the cloned repository in VS Code.
- Make your desired changes to the files or add new files.
- Commit your changes by entering a commit message in the message box and then clicking the checkmark icon at the top of the Source Control sidebar.
- Push your changes to GitHub by clicking the
...button in the Source Control sidebar, selectingPushfrom the dropdown menu.
Notes
- Ensure that you have the necessary permissions to push to the repository if it is not owned by you.
- If you are pushing to GitHub for the first time, you may be prompted to authenticate with your GitHub credentials.
Part 5: How to Use Codespaces on GitHub
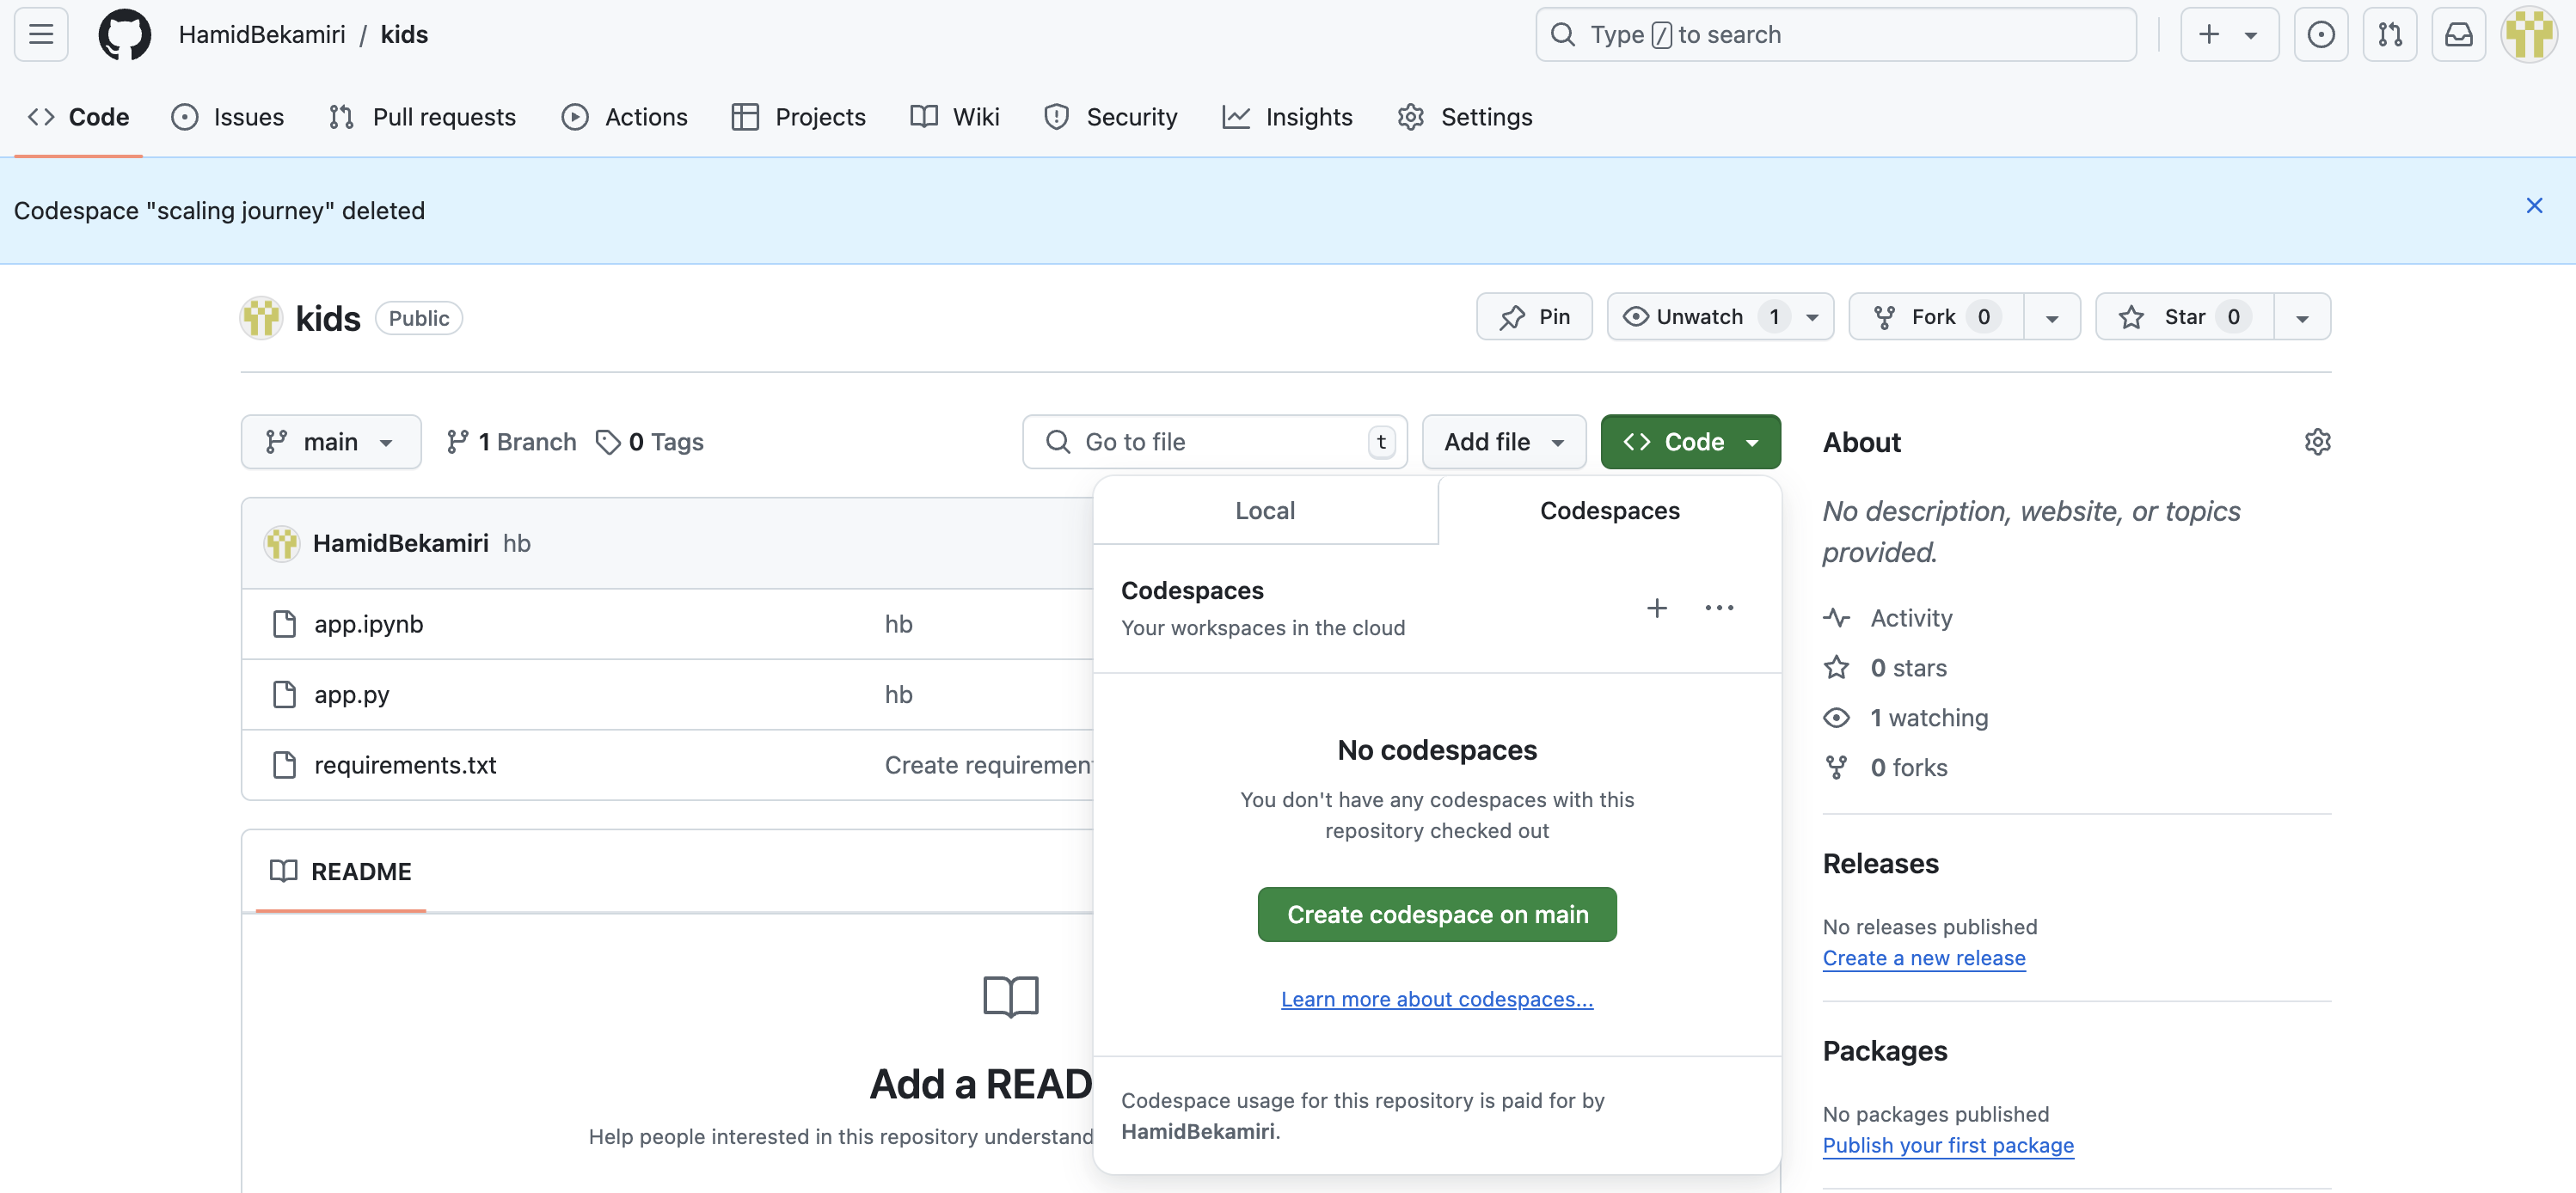
Codespaces is a cloud-hosted development environment provided by GitHub, allowing you to code directly within your repository without setting up a local environment.
5.1. Navigate to Your Repository
- Go to the repository you want to work on.

5.2. Open the Codespaces Tab
- Once you’re in your repository, locate the
Codedropdown button near the top-right corner. - Click on the dropdown to reveal the Codespaces section. If you don’t have any active Codespaces, it will show “No codespaces.”

5.3. Create a New Codespace
- If no Codespaces are created, click on the
Create codespace on mainbutton. This will initiate a new Codespace environment based on themainbranch of your repository.
5.4. Start Coding
- After creating the Codespace, it will launch in a new tab with a fully functional VS Code interface. From here, you can start coding, running, and debugging your project directly in the cloud.